
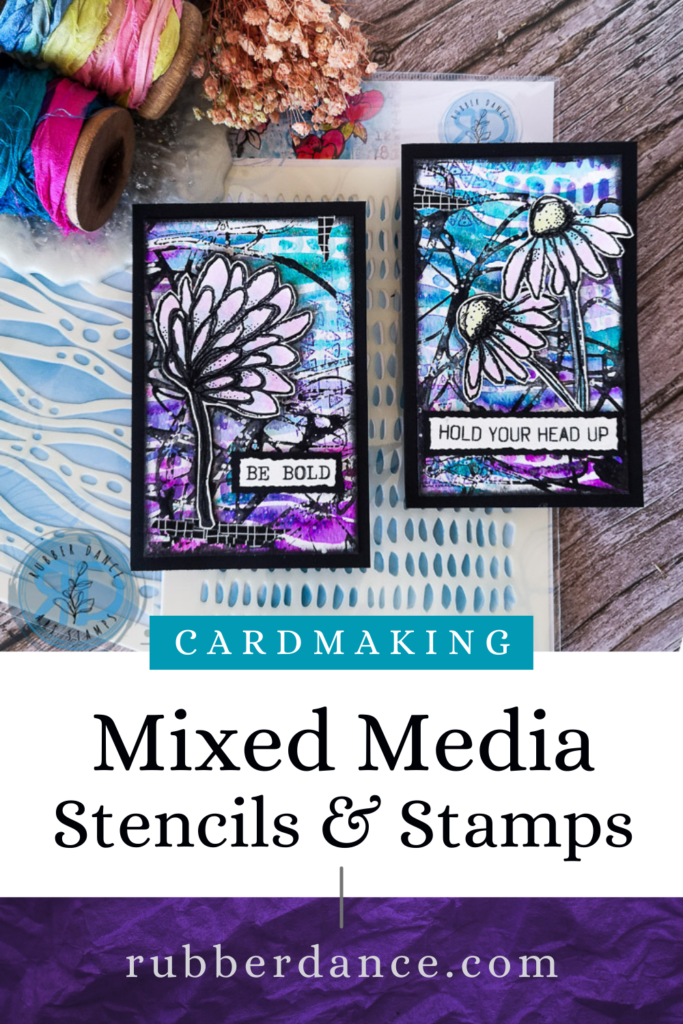
Mixed Media Cards with Stenciled Background
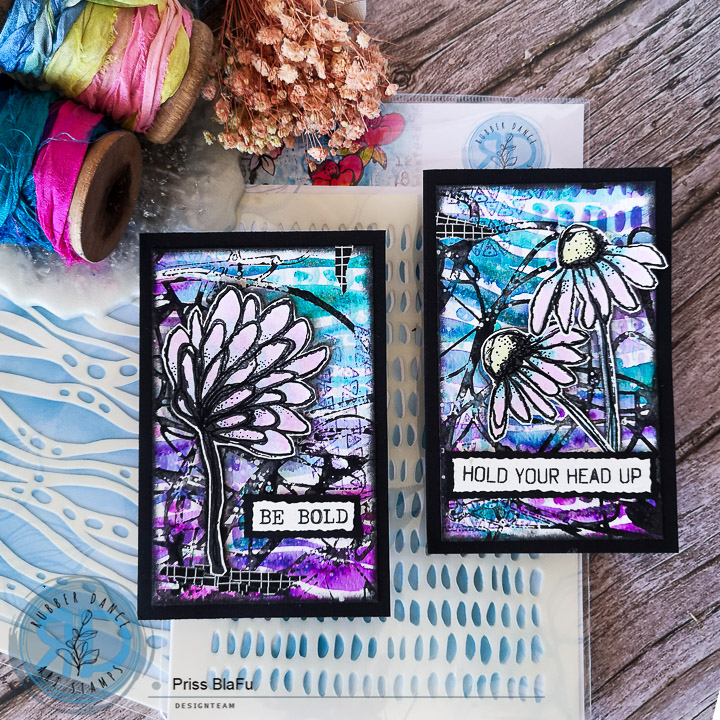
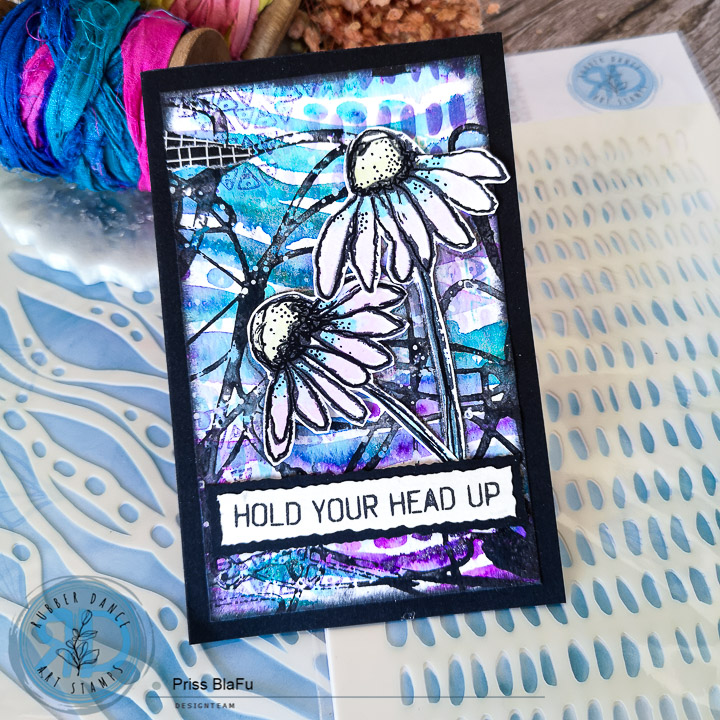
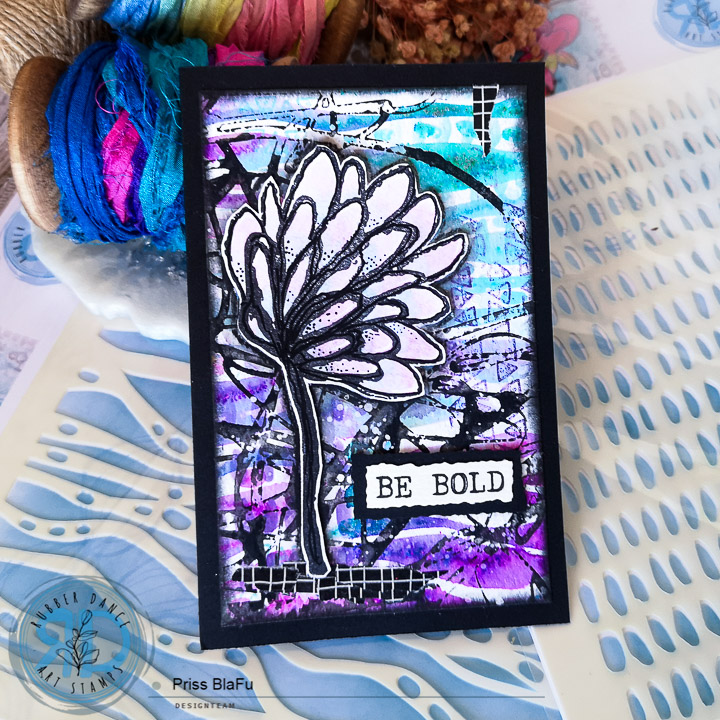
Hello, my lovely crafters! Welcome to another inspirational week. Priss (@atful.layers) is here with you today. I have created some beautiful cards using our amazing brand’s new stencils combinded with Flower stamps from Pencil Marks 6. The stencils allow us to create fascinating backgrounds filled with texture and layers. If you don’t know them yet, don’t delay because I’m sure you’ll love them.
Creating these backgrounds is incredibly easy, and perfect for all mixed media enthusiasts. Start by placing your chosen stencil onto watercolor paper. Personally, I absolutely adore the Organic 1 stencil – it’s simply AWESOME!
Next, give it a light spritz of water and lightly sprinkle some pigments over the stencil. Follow up with another gentle spray of water (just be careful not to overdo it), and if you want the stencil design to stand out more, consider using stencil fixing spray glue. Allow the piece to air dry, and once dry, carefully remove the stencil.
Now comes the second layer- selecting a contrasting stencil for added visual interest. For this step, I opted for Marks 1. Using oxide inks in similar colors to the ones previously used, apply them over the stencil to create intriguing layers of color and texture.
After this, the next step is to apply a third coat using the Scribbles 1 stencil with black acrylic paint, much like a stamp. Place the stencil on a piece of paper and apply the black acrylic paint with a sponge, or brush while keeping it wet by spraying with water.
Be playful and experiment with different application techniques to achieve the desired effect. Let the paint dry completely before moving on to the next step.
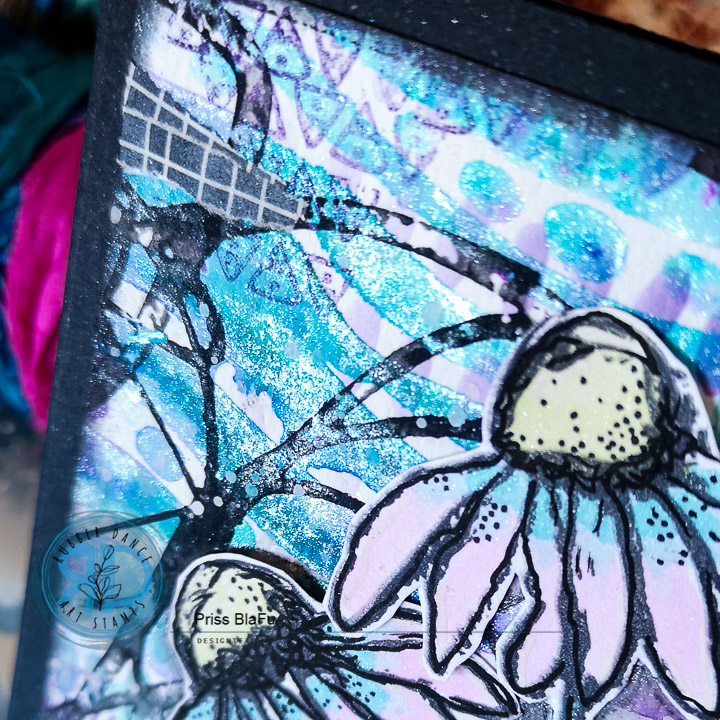
This black overlay will add depth and contrast to your backgrounds, creating a striking visual impact. It’s wonderful how combining different templates and media can result in interesting backgrounds for your mixed media projects.
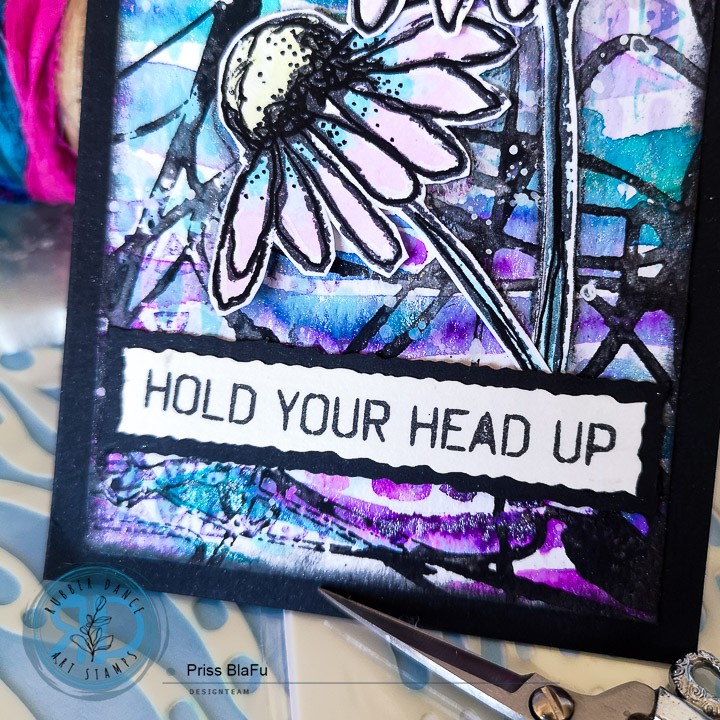
For the final steps of these card backgrounds, let’s add a few extra touches. Take your favorite stamps and ink them with Oxide inks in coordinated colours. Play around with different designs and patterns, strategically stamping them into the background to create interest and depth. I used a stamp from the Mixed Media Borders set.
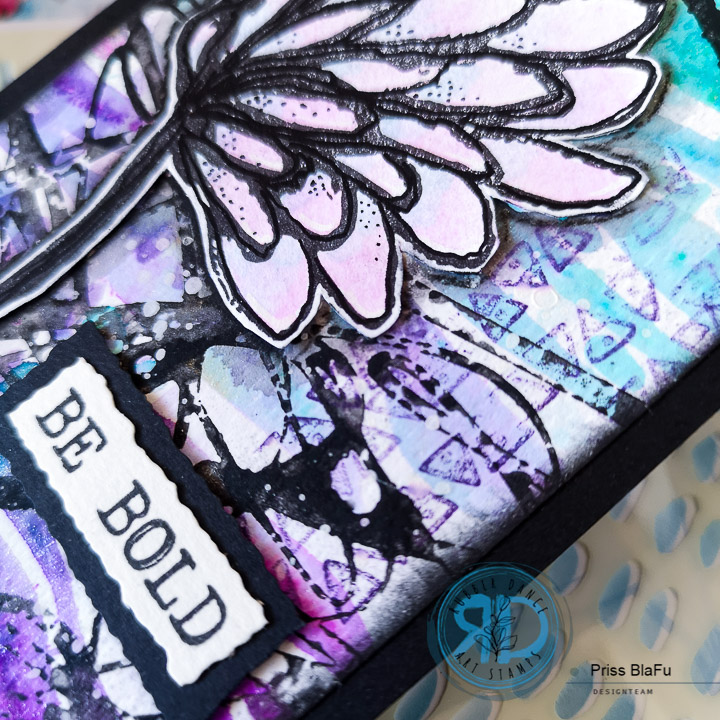
To add a touch of whimsy, take a small, soft-haired paintbrush and dip it into white acrylic paint mixed with water. Create delicious splashes all over the bottom surface. These subtle splashes will add a touch of texture to the overall composition which is quite frankly my favorite touch to finish off any background.
Once you’ve completed these final steps, step back and admire your masterpiece. These backgrounds are now transformed into beautiful pieces, ready to be decorated with focal elements and sentiments. Let your imagination run wild as you continue to decorate these cards and bring your creative vision to life. I have used the flowers from the Pencil Marks 6 set and encouraged sentiments from Mixed Sentiments 1.
Remember, as a mixed media artist, feel free to adapt and modify these steps to suit your own artistic style and preferences. Let your creativity flow and have fun exploring the endless possibilities that stencils, stamps, and color offer in your mixed media projects.
Just a friendly reminder that our stunning July Mood Board is still active in the Rubber Dance Stamping Lounge on Facebook until the 31st, as well as on Instagram under the hashtag #rubberdancemoodboard. Don’t miss out on this creative inspiration! Join us and share your artwork for a chance to win an amazing prize. Trust us, it’s definitely worth it! We can’t wait to see your beautiful creations and connect with fellow artists in our wonderful community.
Hugs, Priss
(My Posts | Instagram | Facebook)
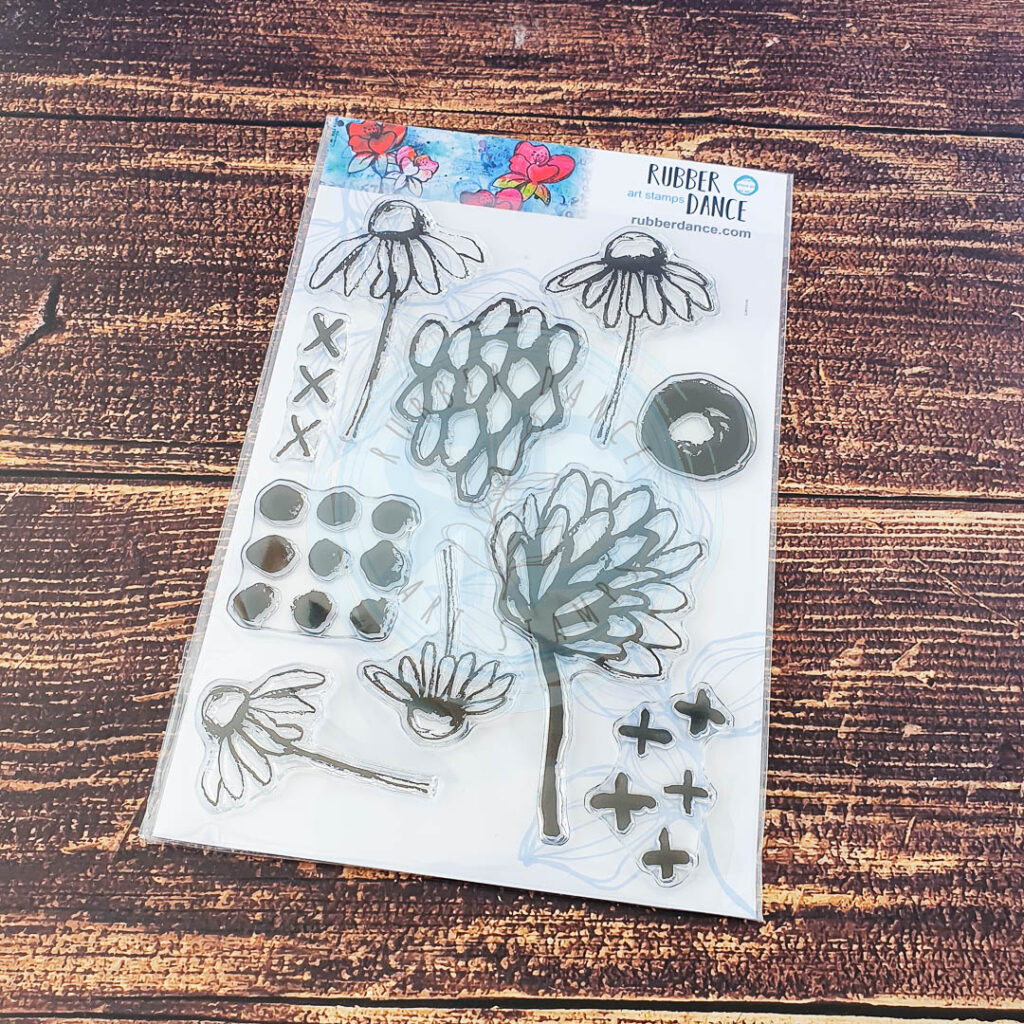
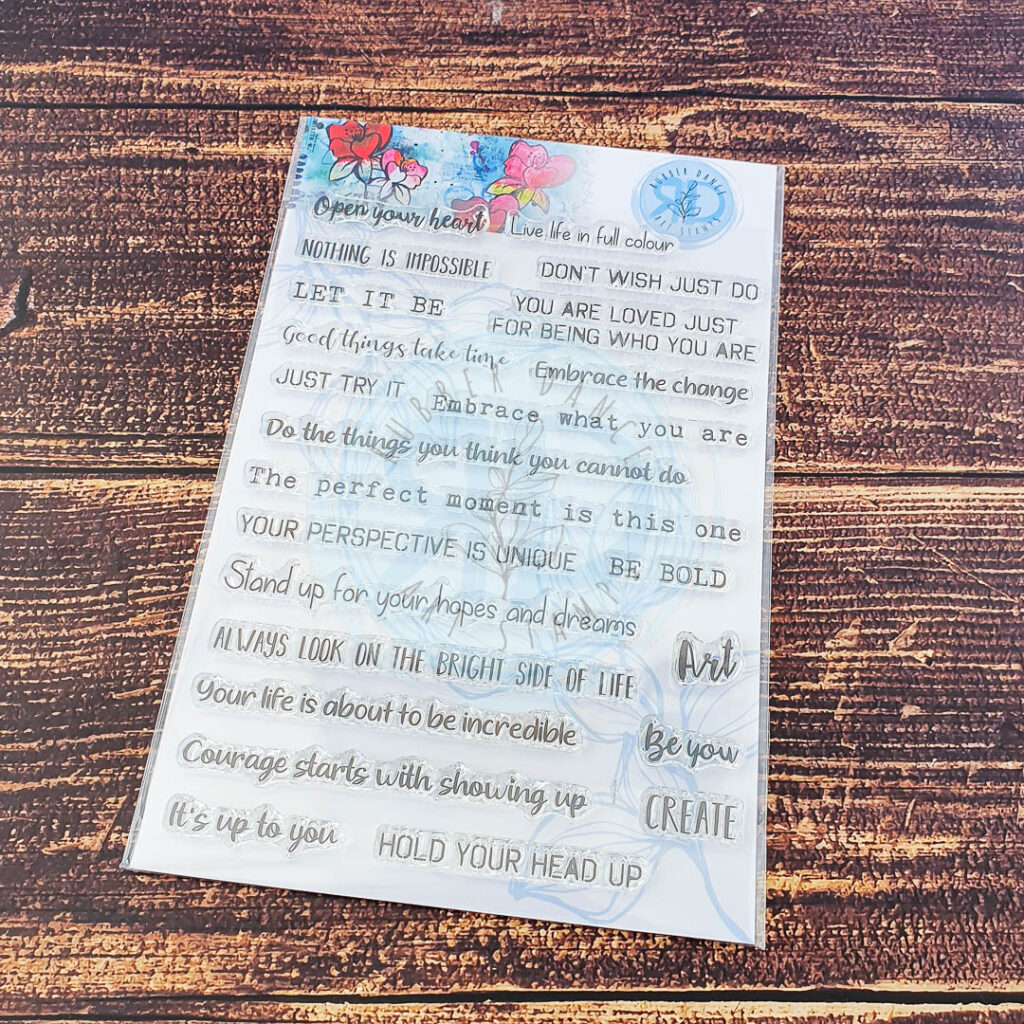
The stamps I used


Share this post:


Comments are closed for this post.