
Greeting Card: Stamping over a Stencil – Tutorial
Hey everyone, Isa here!
I’ve had the greatest fun creating cards from a larger painting I did a few weeks ago, and adding stamp on top of stencils to give them a very unique look !
This project is a great way to re-purpose paintings or journal pages you half-like or even are about to throw away 😉.
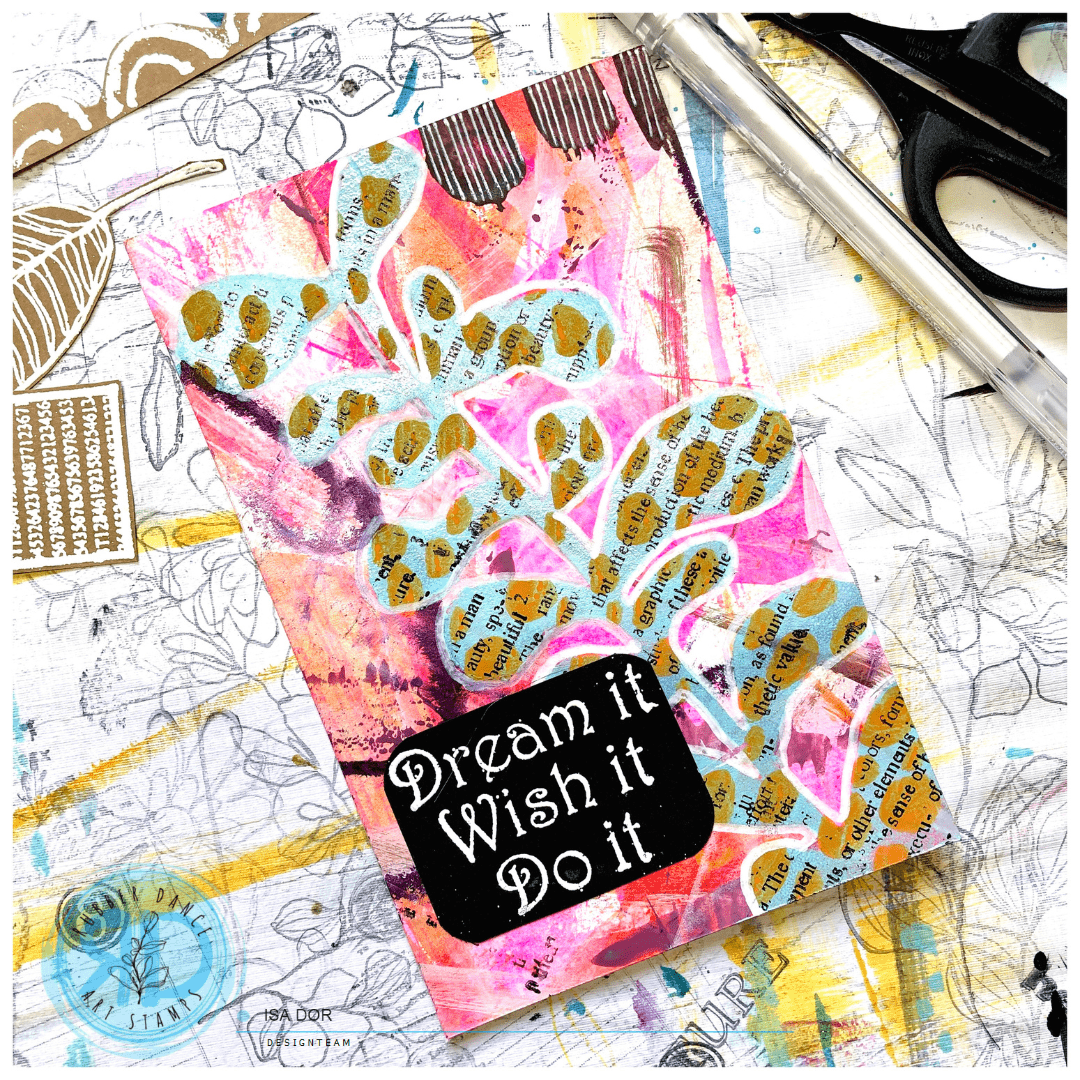
It all started with a painting I did with my students a while ago, and as is, felt too bold and loud to be hanging on a wall. So instead of painting over it, I cut it into card-size pieces.
I then picked one that had some black marks on it and drew lines with a white gel pen on them. The tone is set, this is going to be unconventional!
Next, I grabbed one of my handmade stencils and used a make-up sponge to apply light turquoise acrylic paint through it. I chose a rather large stencil for the card, as I wanted to have large areas where the stamped image would be visible.


Once the paint was dry, I painted orange dots inside the stenciled shape with a large Posca pen. I always feel that pink, turquoise and orange are a winning team!
Here comes my beloved Art Defined stamp! I first repositioned the stencil on the card, making sure it’s at the same place, and I stamped with black ink right over the stencil on the open areas. It was the perfect width to fill in the shape, and the result is outstanding!


I then outlined the stenciled shape with a white Posca pen.
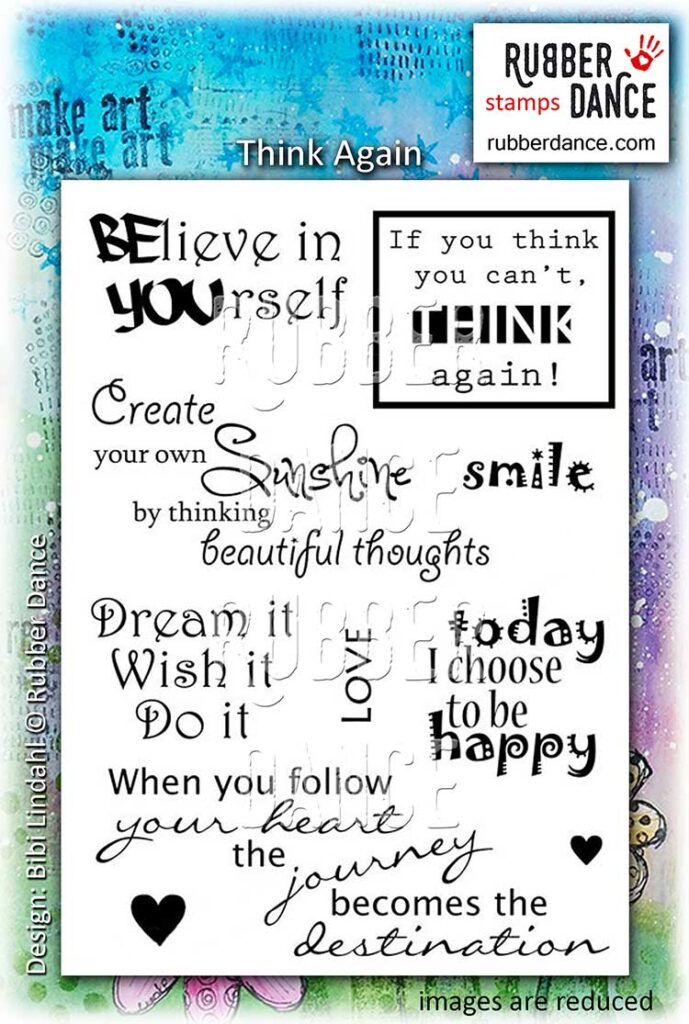
A greeting card isn’t a greeting card without a sentiment: this quote from the « Think Again » set is the perfect one to get our creative juices flowing! I used a clear embossing inkpad and white embossing powder on a black cardboard to draw all the attention to the quote!


I hope you’ll enjoy creating this easy card project!
Be Bold and Shine,
Isa
RubberDance stamps I used:


Subscribe to our Newsletter


Comments are closed for this post.