
Mixed Media Tag with Stencil Background and Pencil Marks
Hi it’s Sara Ferret here with a colourful mixed media tag tutorial using the Big Triangles stencil and stamps from Pencil Marks 7 and Mixed Media Marks 1. I will show many different ways to use a stamp and also an alternative use for a stencil.
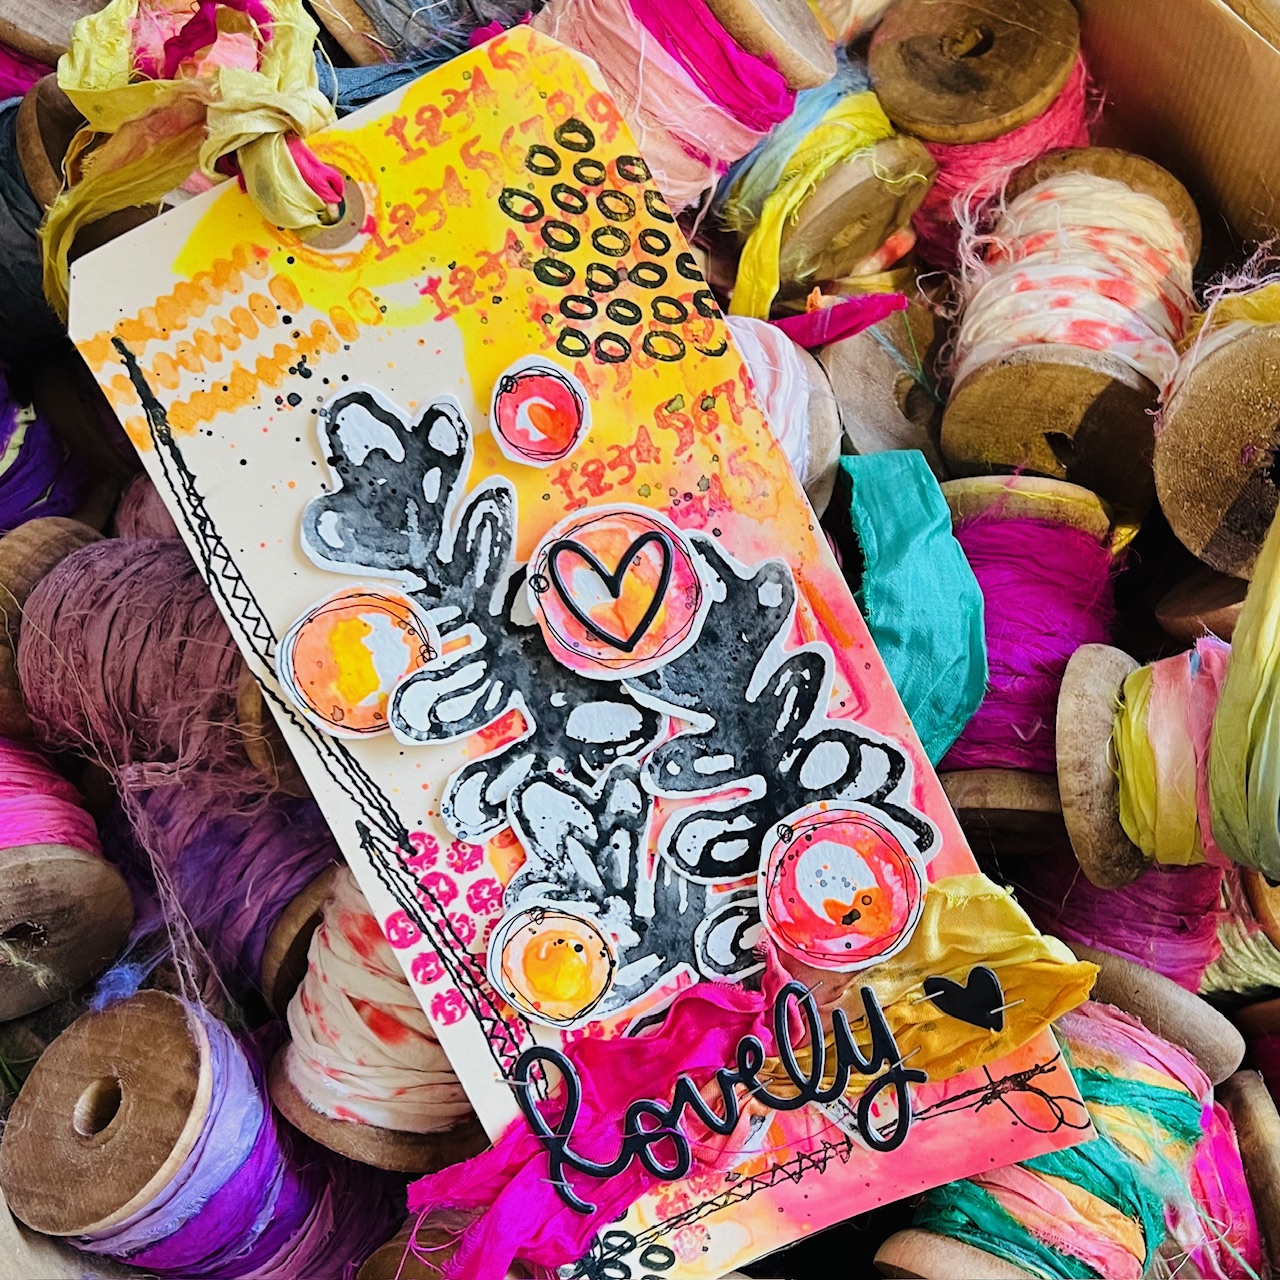
First of all I’m going to make a resit in the background with a white wax crayon and the stencil I selected. When I use the watercolor on top of the crayon, the wax resits the color.


After drying the wet background, I’m stamping some images from Mixed Media Marks 1 with different kind of inks and I’m also using a wet watercolor crayon (Stabilo Woody) to add color in the stamp and stamp it in the background, too.


After that, I took the stencil again, but I’m using it in a different way. I’m taking a pink wooden color to draw the silhouette from the triangles, and I’m taking the orange watercolor crayon again, and this time I use it to color a little bit inside of each of the triangles.


Now we have a full background, but we need to create a focal point. I’m using the same technique as before, adding water to the black Woody pencil and use it to ink up the stamp. If you don’t have Woodys you can use Neocolor II or Scribble Sticks as well. I’ve picked one of the botanical from Pencil Marks 7. This way our stamped image becomes a little bit undefined, and creates a hand drawn effect.


I cut all these shapes out, so I have the ones I need for this project, and I also some extra elements done, for future creations. I’m going to create other extra elements to have extra layers on our tag.
I’m using one of the flower stamps from Pencil Marks 7 . This time I’m using the neon watercolors, to achieve more or less the same effect as before, but I have no neon pink Woody. When I have the flower stamped, I’m painting the inside of the flower with the neon watercolors, and I’m adding some splatters.


The last thing I’m creating are some circles, also with this technique. When they are dry, I’m doodling around the shapes with thin black pen. After that I’m cutting all the shapes.


At the end I need to create the composition with all this elements I created before, plus I’m adding some sari ribbon and also a sentiment sticker.


Thanks for stopping by today!
The Rubber Dance products I used:


Share this post

Subscribe to our Newsletter


Comments are closed for this post.