
Dream Catcher Art Journal Tutorial with Inky Flowers
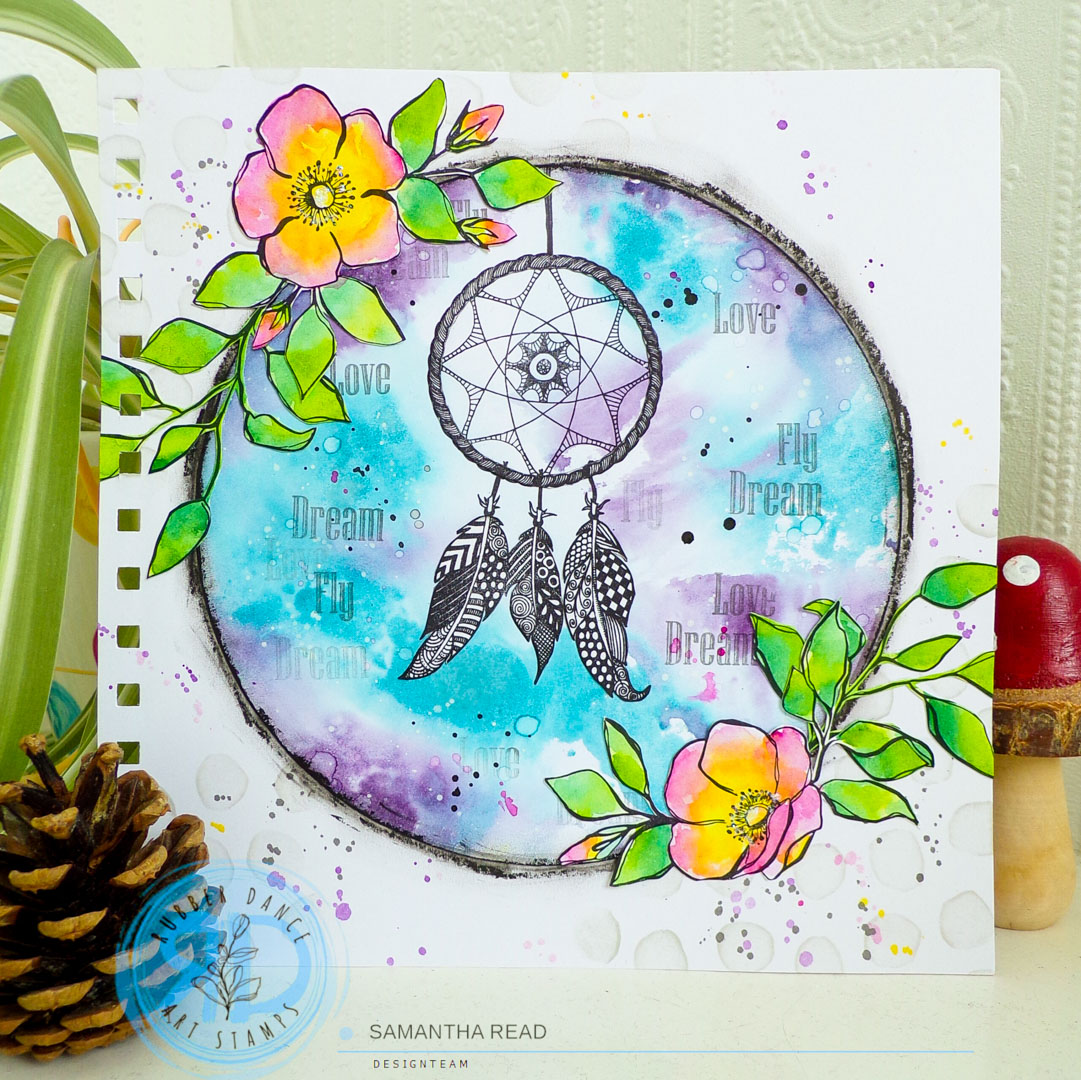
Hello, Samantha here today. I’m sharing with you a tutorial showing how I made the latest page for my art journal. It was inspired by Susanne’s recent lovely artwork featuring big circles. I found the circle to be quite dynamic to use because you have the inside and outside of the circle with their varying focal points.
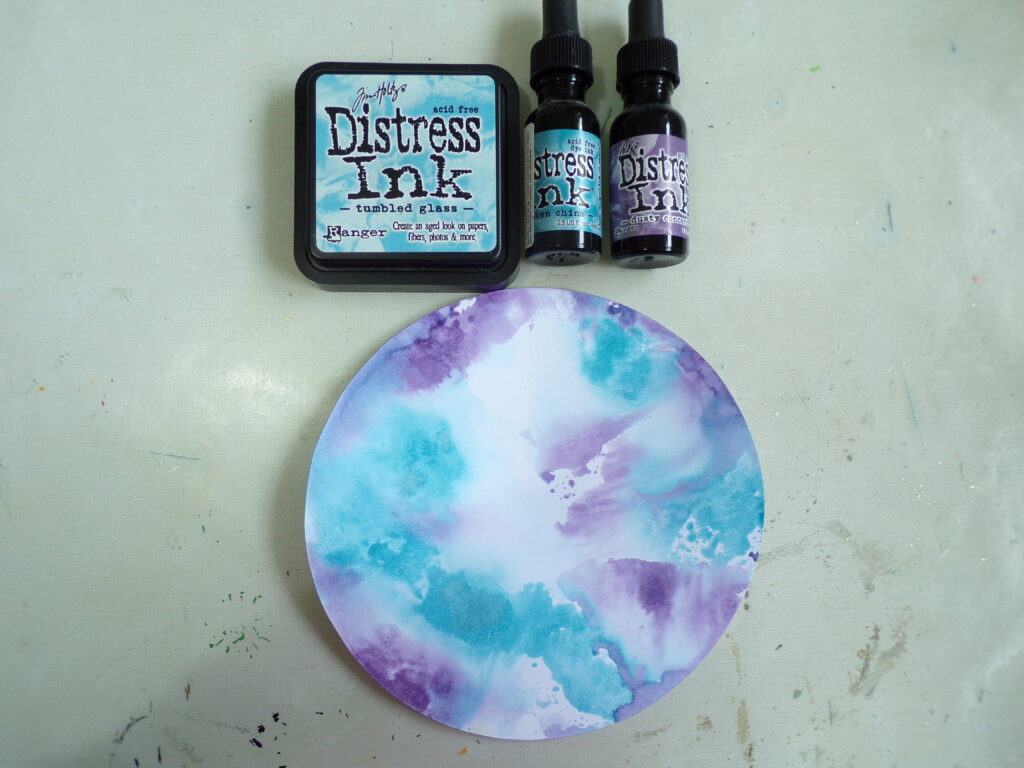
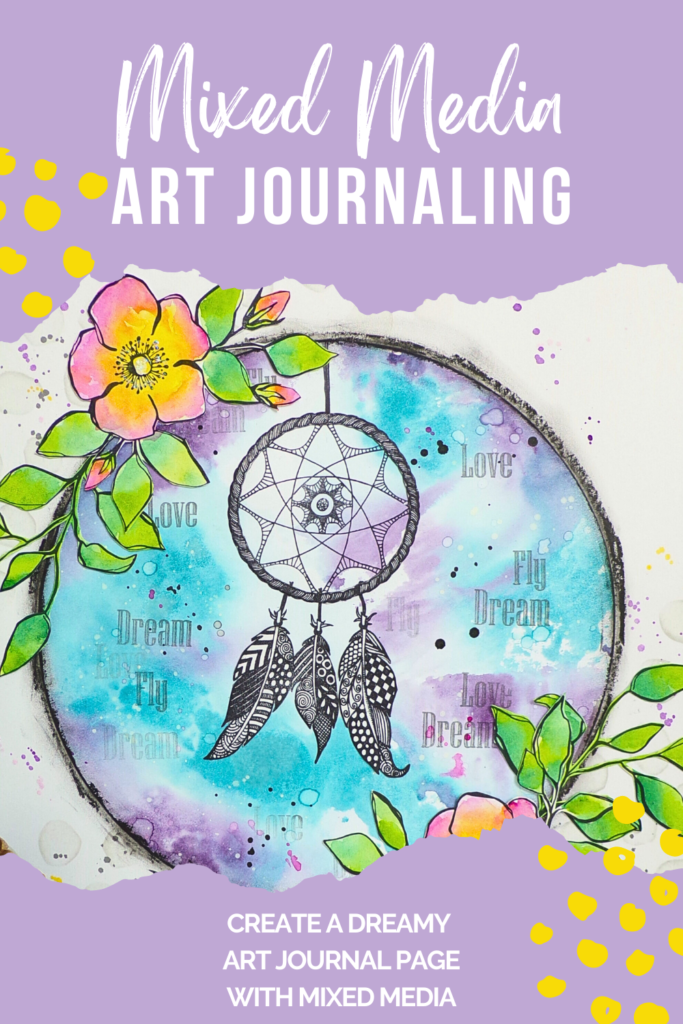
I began by cutting a circle 6 inches in diameter and swooshing it in two complimentary colours of distress inks, making sure to leave some white space.

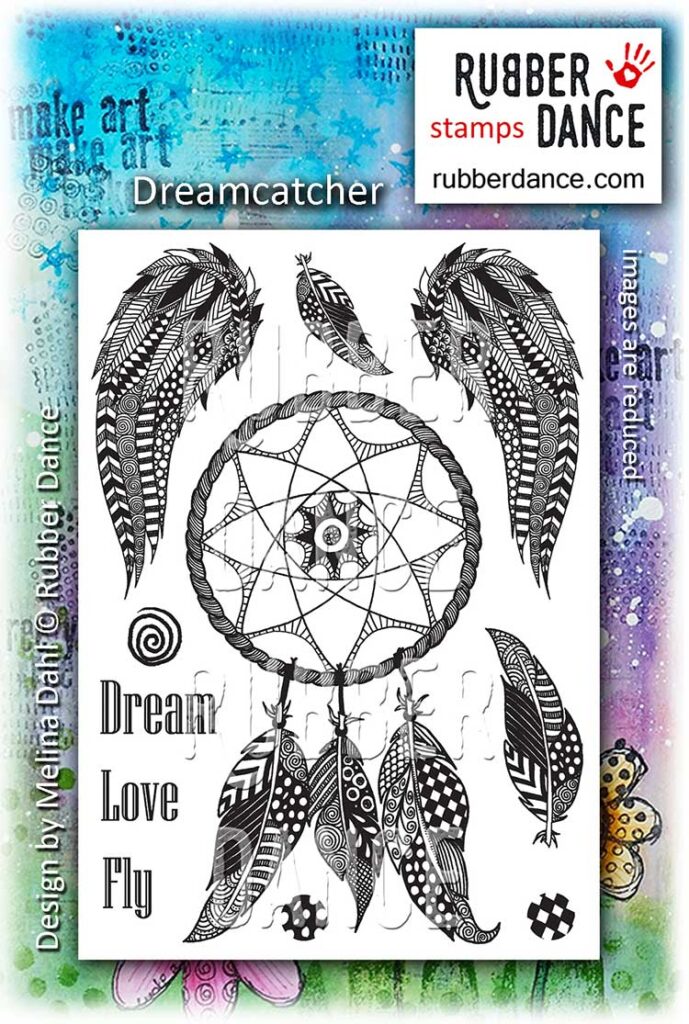
I then stamped the wonderful Dreamcatcher stamp directly on to it’s background.
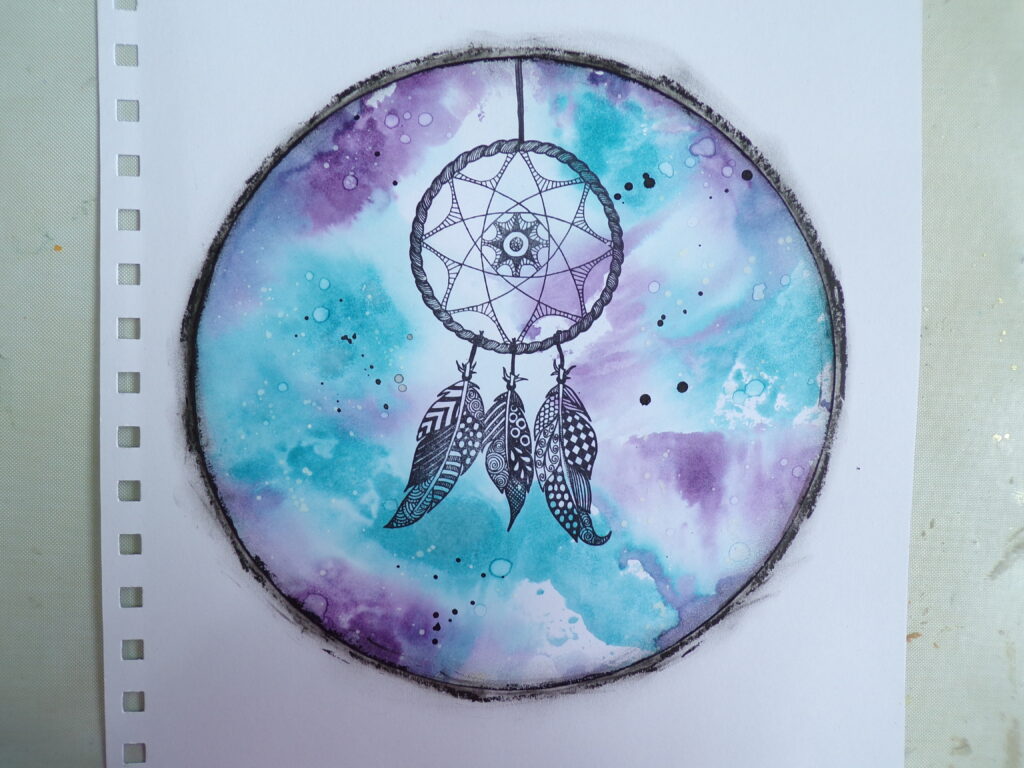
The next step was to mount the circle on to my journal page, I used a black gelato to mark the outside. This hid the edge of the paper circle and embedded it to the page.
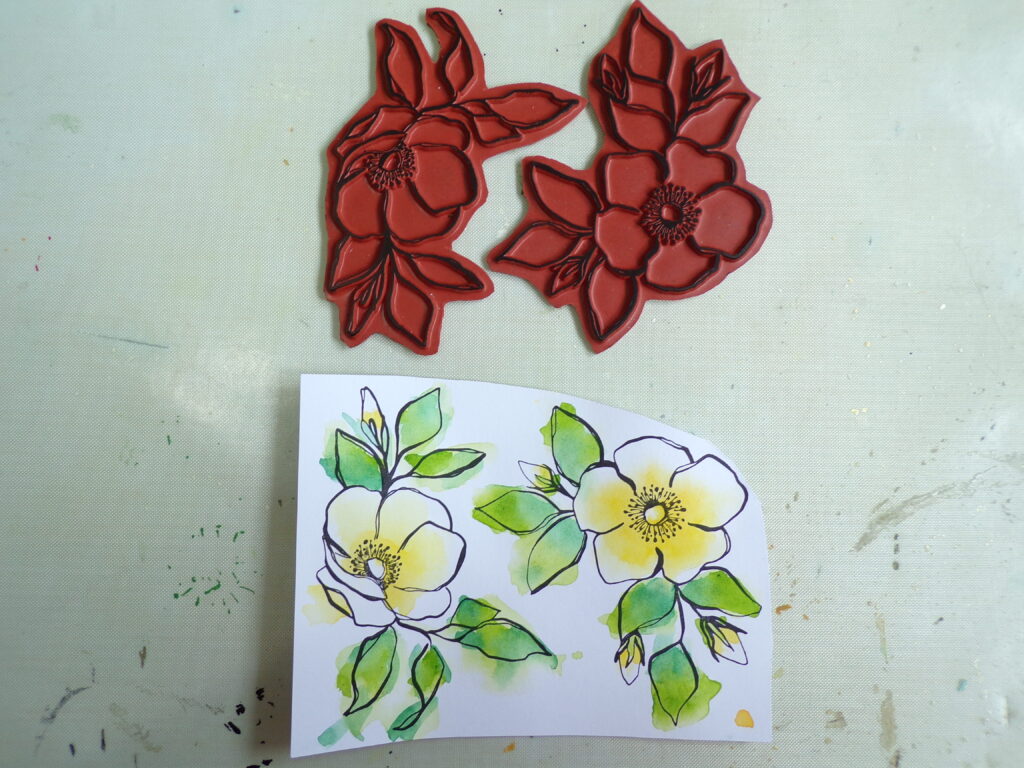
On white card I stamped some flowers from the wonderful Inky Flowers stamp set and coloured them using watercolours. (I also stamped some leaves but this was after I took the photo.)
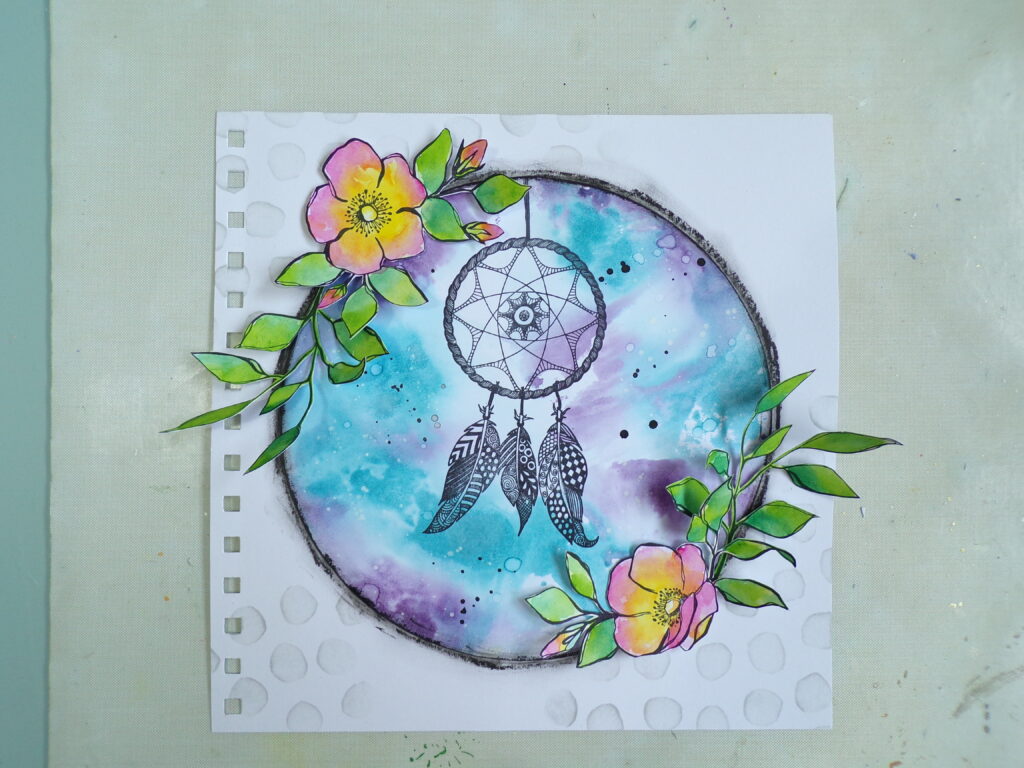
I then adhered all the flowers and leaves after getting the placement how I was happy and cut off the excess. I also stamped the dreamcatcher again and cut out the rope circle and feathers, and adhered them on top of the previous stamped dreamcatcher to make them white and stand out from the background, see the main photo.
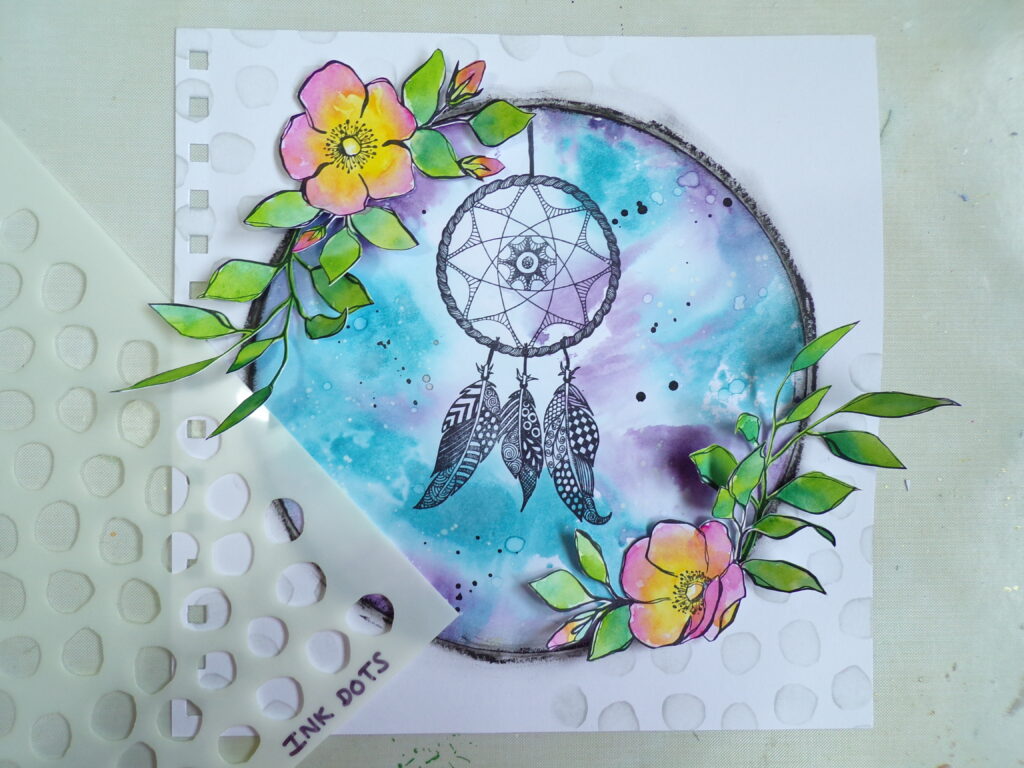
Using the new Ink Dots Stencil I added some very delicate background details on the page, this draws your eye out of the circle and keeps them moving around the page.
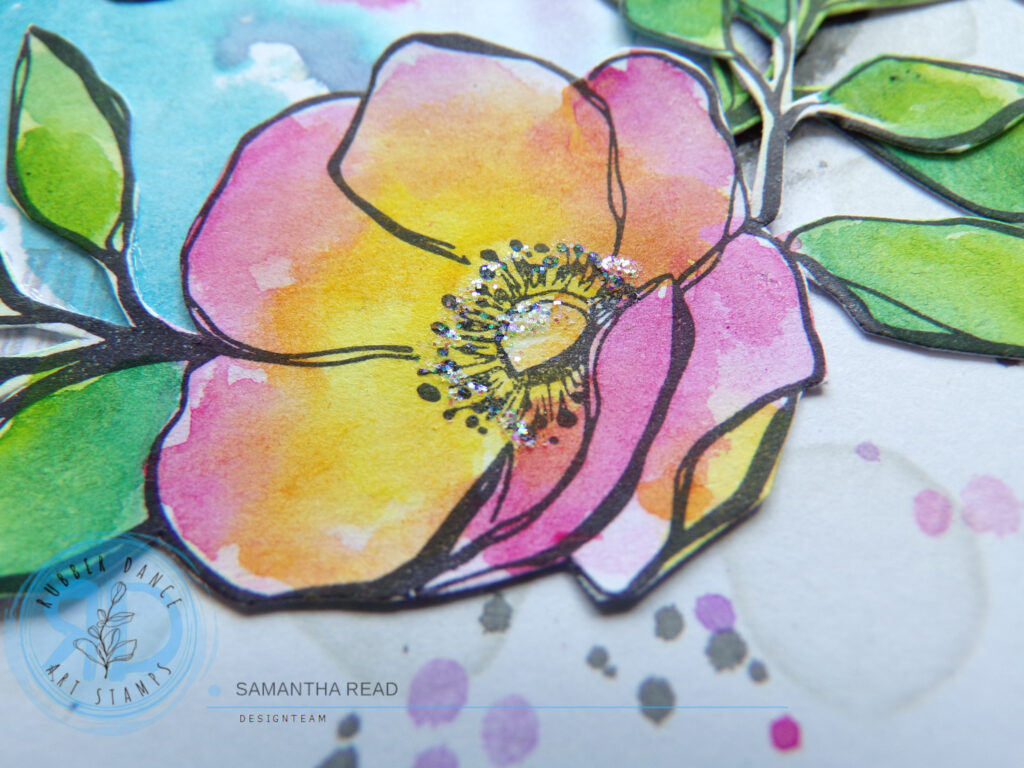
To finish I added some inky splats, some text in the circle and some glitter to the flowers.
Thanks for stopping by, have a lovely day, Sam x
Stamps from the Rubber Dance shop

Share this post


Comments are closed for this post.