
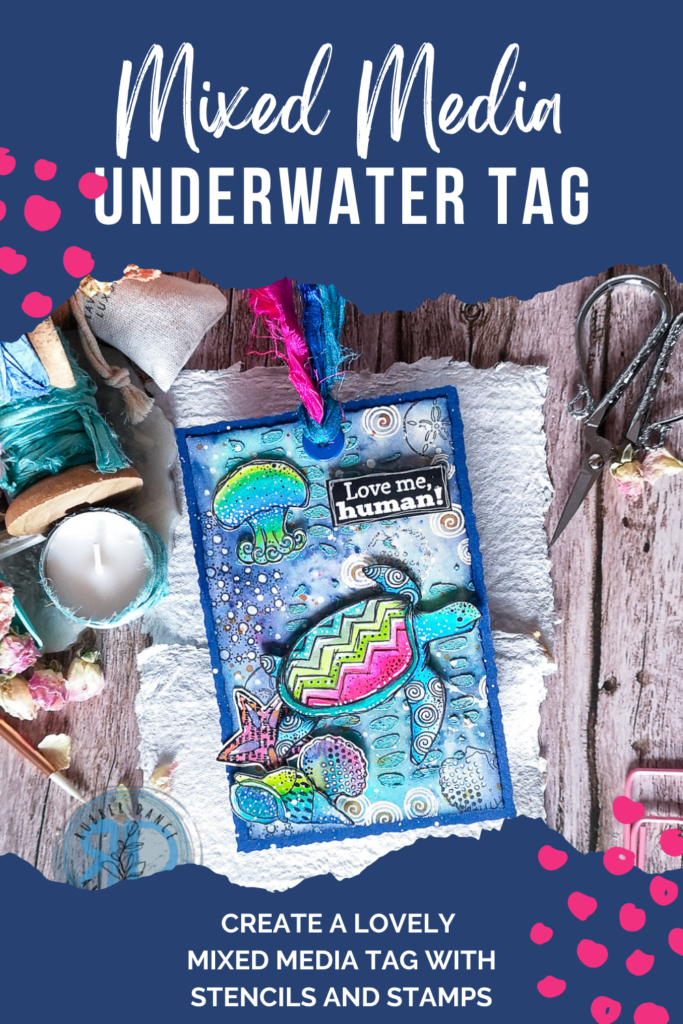
Tag with Textured Sea Creatures

Hello friends!!! Ready for another week full of inspiration on the blog? Priss here (@atful.layers) to continue showing you how we can use the backgrounds we created last month with this tutorial. Today is the turn of a tag using background number 5 “Stenciling with Texture Paste” and the adorable sea creatures from the Textured Sea Creatures set. A tag full of layers and textures, so come with me and let me inspire you.
Last month, I made a video tutorial showcasing 7 innovative ways to use our new stencils. However, if you’re new to Mixed Media, simply learning how to use stencils isn’t enough. You also need to know how to effectively use those backgrounds. Today, I’ll be explaining how I created this tag to inspire you and provide guidance for creating your own.
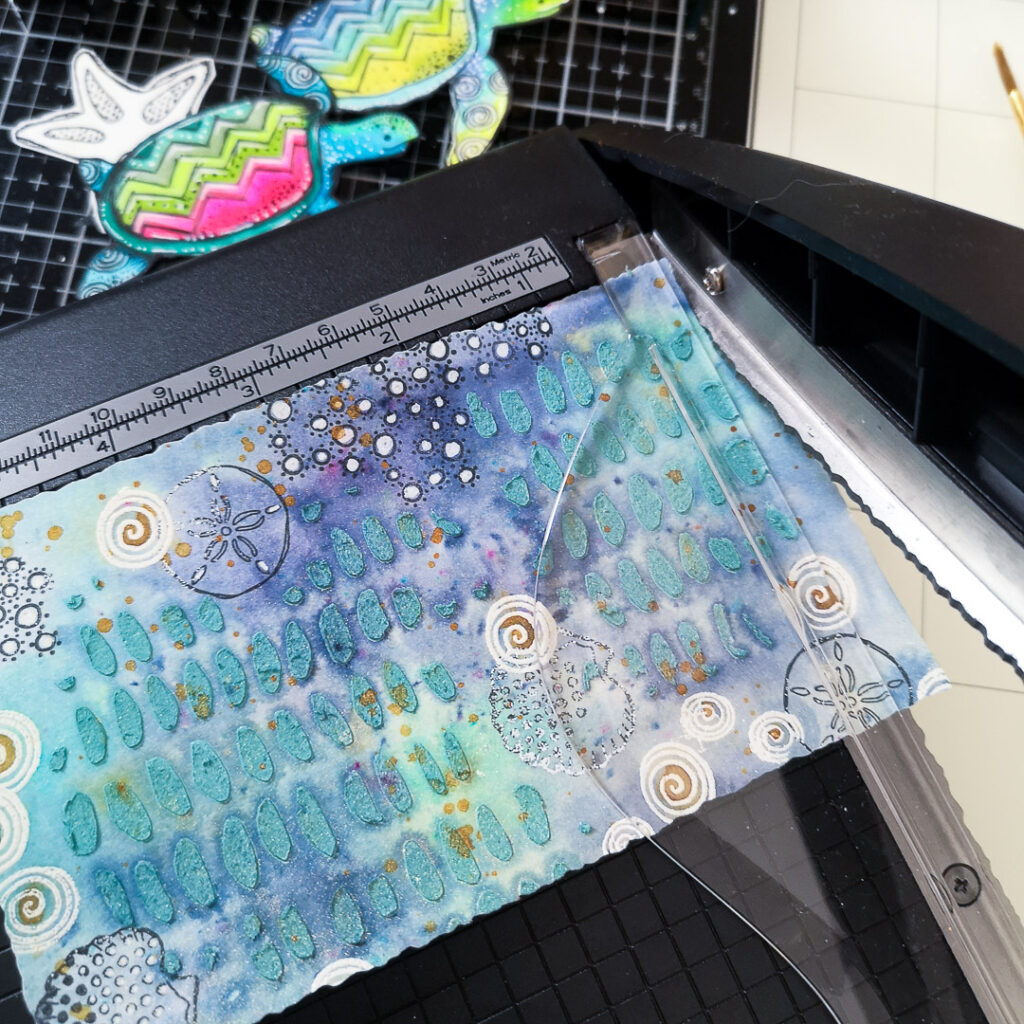
I created this background using stencil Marks 1 and Paper Texture Paste, adding pigments to color the paste. You can view the process for this background in a short video here.
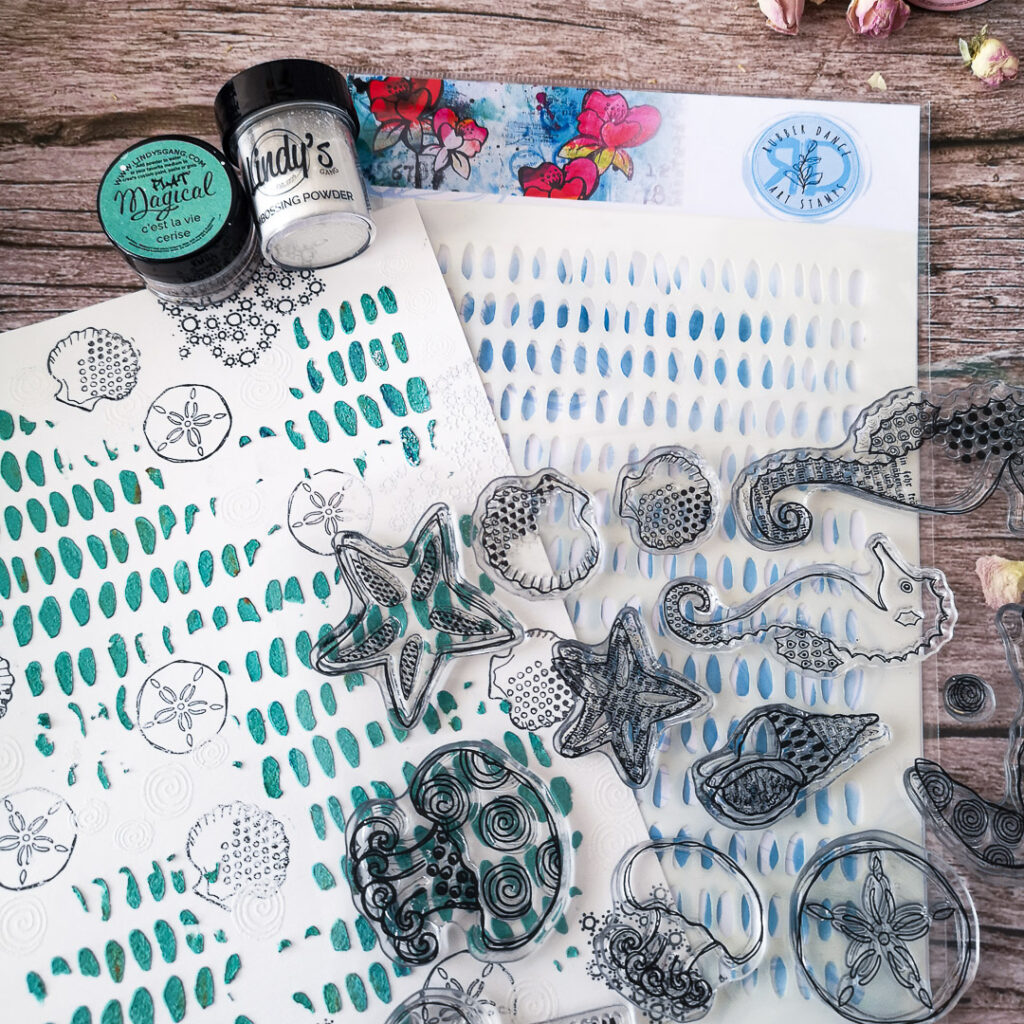
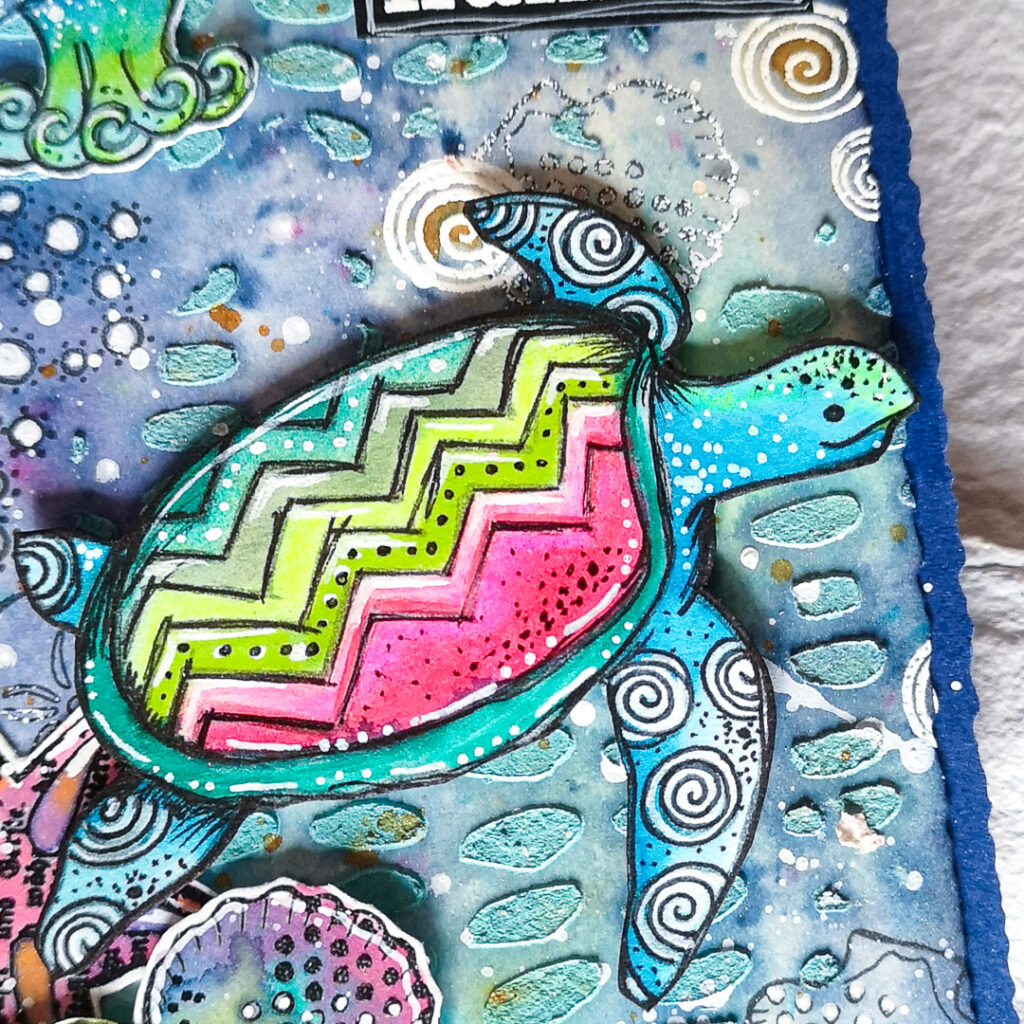
To create my design, I started by stamping some shells using black permanent ink. Then, I added some white swirls using embossing powder.
I applied blue and turquoise pigments onto the white parts of the paper and added antique gold pigment to give it a subtle golden shimmer.
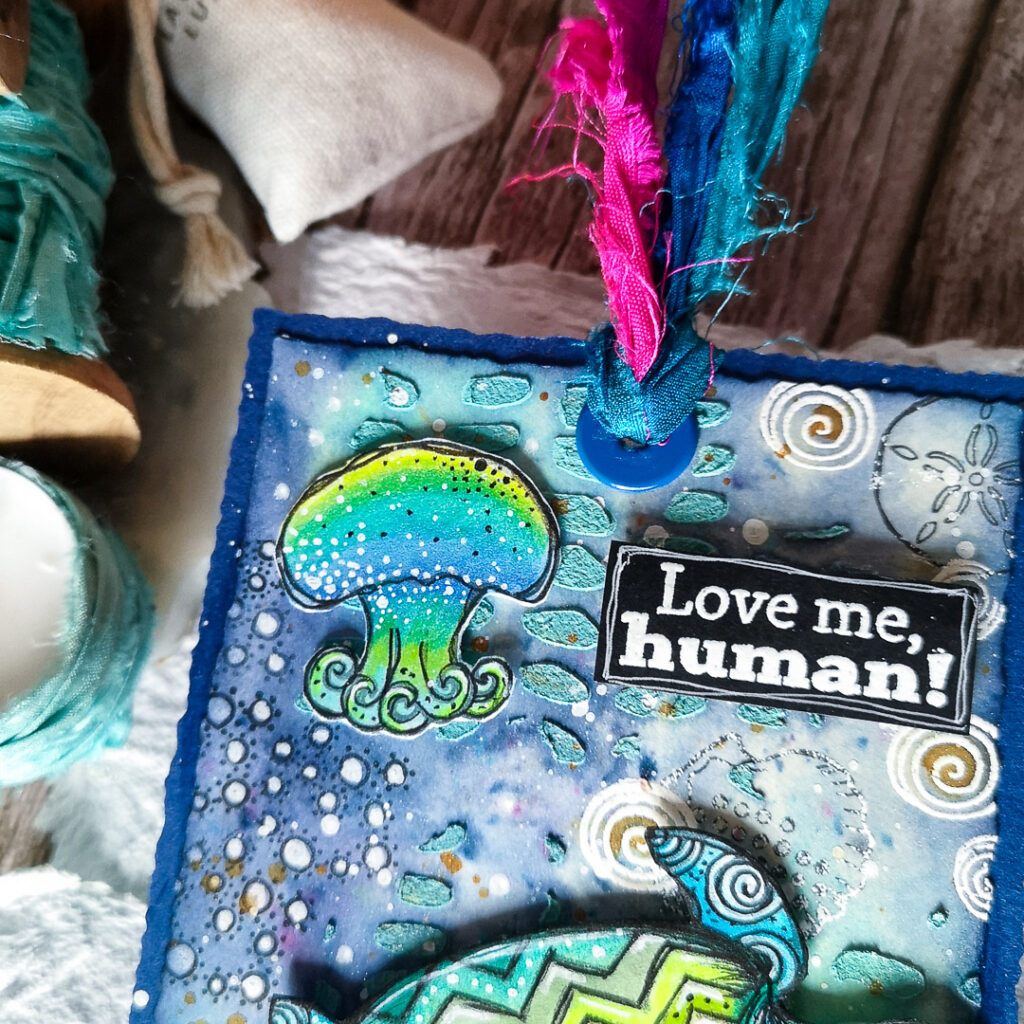
After carefully selecting the best part of the background, I cropped it to a size of 5¼ x 3¼ inches, giving it a beautifully distressed deckle edge. To make my tag stand out even more, I distressed the edges with dark blue ink and then I glued it onto a 5½ x 3½ inches blue cardstock also with a distressed deckle edge.
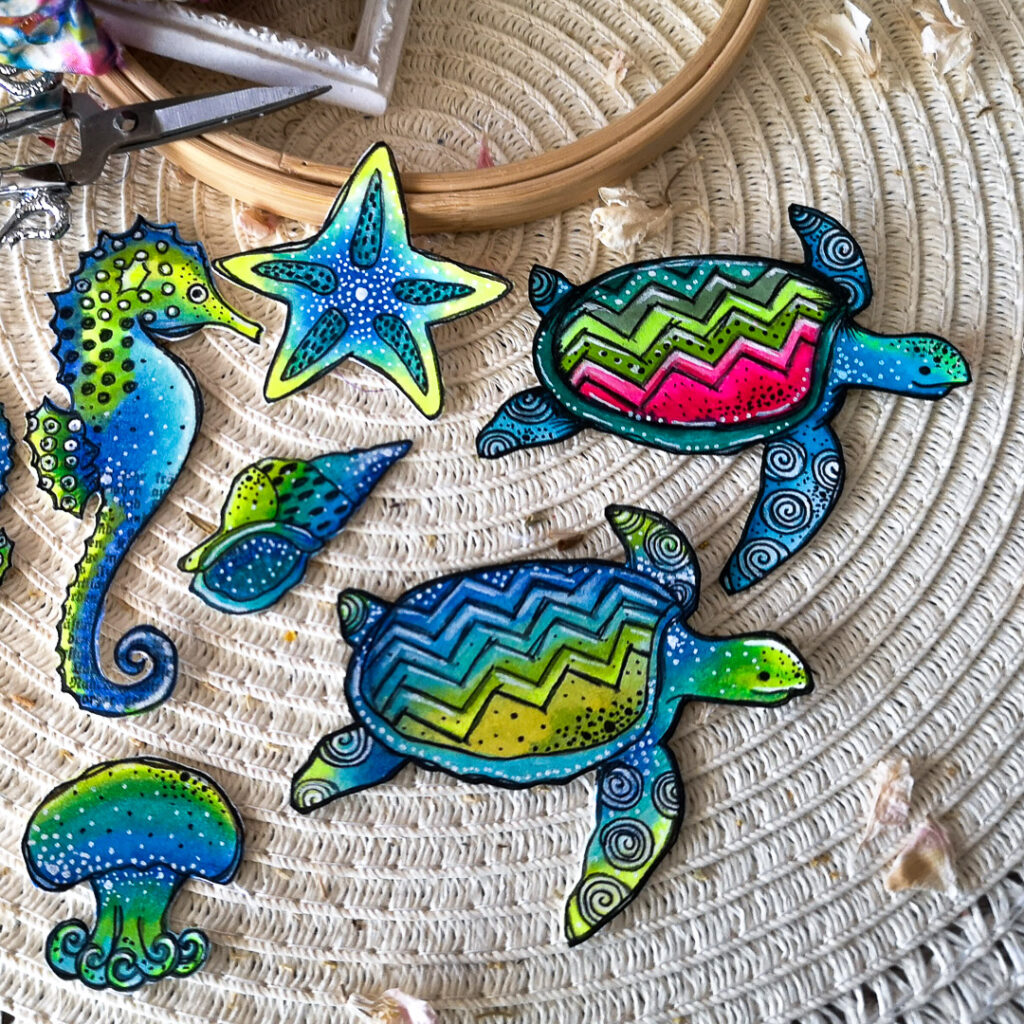
I selected the adorable animals from the Textured Sea Creatures set as my focal points and stamped them onto watercolor paper. Then, using my preferred watercolors and pigments, I added some character and hue to these charming creatures. However, I didn’t stop there! To make these turtles more stunning, I used colored pencils to add depth and dimension by emphasizing and shading. These simple techniques will definitely make your stamps pop!
To complete your project, simply create a pleasing composition, select a nice sentiment, and add some white splashes as a finishing touch. I adore the white splashes, as they bring the entire project together and provide an additional layer of contrast.
I have some photos of the project that you may want to take a closer look at. I really hope you enjoyed the post and that it has left you feeling inspired to create some amazing tags using these stenciled backgrounds.

And finally, don’t forget to share your creations with us in our FB group (Rubber Dance Stamping Lounge), we’d love to see them!
Until next time, happy creating!
Hugs, Priss
(My Posts | Instagram | Facebook)
These are the products I used


Share this project:


Comments are closed for this post.