
Stamping Textured Flowers with Gold Leaf
Hey there, it’s Isa! Today, I’ve got something really cool to share with you—I’ll show you how to create a stunning card using gold leaf with your the Textured Flowers stamp set!
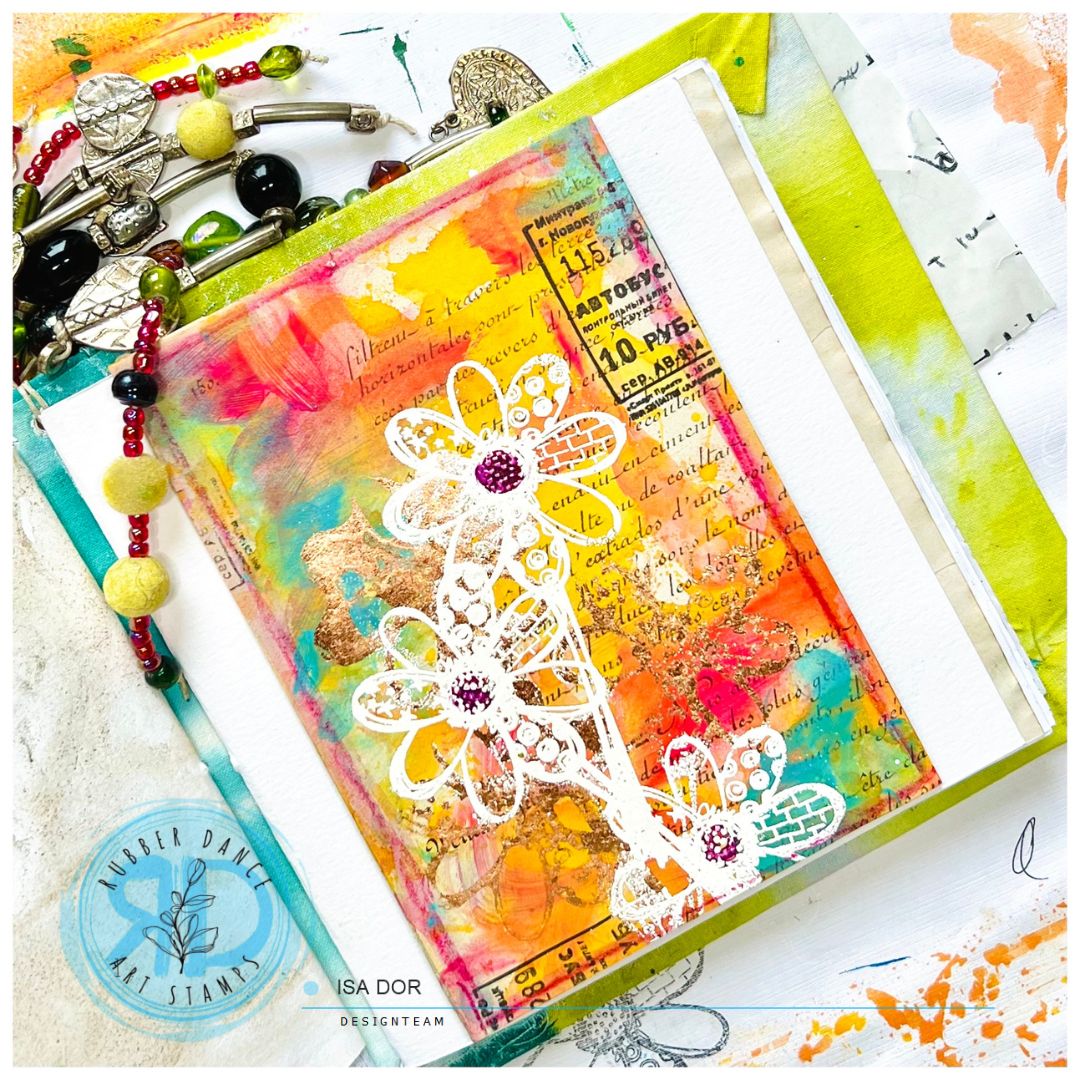
Now, I’m all about recycling and using what I have on hand. So, for this card, I decided to repurpose the back of a notepad. To give it some character, I glued down a page from an old measurement book I found at a flea market. The page already had these beautiful colored marks from a previous session with Dylusions sprays (you can check out that fun project here). I added some contrasting paint with a brush and my fingers to add even more texture.


Next up, gilding paste! I applied it on my Textured Flowers stamp using an old stiff brush. Okay, I admit, I might’ve gone a bit overboard with the paste, so remember to use just a tiny bit and make sure to wash your stamp with soap afterward.
With the gilding paste on the stamp, I stamped the card several times to create a beautiful background pattern, kinda like a bouquet of flowers. After waiting a few minutes, as per the instructions on the gilding paste bottle, I sprinkled gold leaf flakes on the paste. A soft brush helped me gently press the gold leaf onto the stamped images. The first one got a bit too much gold leaf due to my enthusiasm, but you know what? It ended up looking fabulously grungy, and I loved it!


Now, to add some extra charm, I grabbed a ticket image from the Mix It Up 2 stamp set and placed it on the edges of the card before moving on to the embossing process.
Using the same flower stamp, but this time inked with Versamark, I stamped the image three times on top of the gilded flowers. Then, I sprinkled ivory embossing powder over them and gave it a good heat embossing treatment.


For that finishing touch, I wanted to give the card a bit more dimension. I painted the hearts of these embossed flowers with a dark color and outlined the borders of the card using a Derwent Intense pencil. After that, a gentle brush with a water brush blurred those pencil lines perfectly.

Ta-da! There you have it—a gorgeous and unique card with a touch of gold leaf magic. I hope you enjoyed this little creative adventure, and it inspired you to try out some fun techniques on your next project. Happy crafting!
Be bold and shine
Isa
Stamps I used:


Share this project:


Comments are closed for this post.